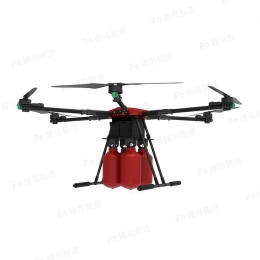
install
1. Unfold the arm: fully unfold the arm and screw the reinforcement screw into the fixing hole on the folding part.
2. Check the arm and steering: check the steering of 1-6 arm motors. 1 / 3 / 5 arm motors rotate counterclockwise (CCW) and 2 / 4 / 6 arm motors rotate counterclockwise (CW). Pay attention to check whether the propeller installed on the motor is correct.
3. Open the remote controller, install the battery in the battery compartment, connect the battery at the power supply end of the flight control, and the aircraft enters the self inspection state after the flight control is powered on. At this time, do not touch or move the aircraft.
4. Open the mobile phone ground station and connect the UAV in the software. After the connection is completed, open the flight information status panel to confirm whether each module is normal and whether the number of GPS satellites is sufficient. The status light of each module is green, and the next action can be performed after GPS 3D positioning.
Pre flight inspection
1. Ensure that the batteries of the aircraft and the remote controller are sufficient, and the pesticide required for spraying is sufficient.
2. Ensure that the aircraft battery is fixed.
3. Ensure that all components are installed firmly.
4. Ensure that all wires are correct and firm.
5. Ensure that the motor and propeller are installed correctly and stably and can work normally. All the arms and propellers have been fully deployed and the fastening screws of the arms have been locked.
6. Ensure that the spraying pipe is free of blockage and leakage.
7. Test whether the nozzle works normally. If the nozzle cannot work normally, it may be caused by bubbles in the pipe. Unscrew the pressure relief valve on the side of the nozzle to make the liquid pump work. After the air bubbles are discharged, the pressure relief valve can be tightened to make the nozzle work normally.
8. Strictly implement the principle of spraying one bucket of Medicine on one battery.
Basic flight
Startup mode: after confirming that the pre flight inspection is correct, confirm that the surrounding environment meets the requirements in the precautions and safety summary, connect the battery at the power supply end, and unlock the inside eight of the rocker. After the motor idles, slowly pull up the accelerator until the UAV takes off. After takeoff, the UAV can be controlled to conduct manual spraying or AB point operation / autonomous operation.
Stop mode: when the operation is completed or the chemical solution needs to be added or the battery needs to be replaced, control the UAV to land at an open and safe position. After the accelerator is reset to zero, perform the outer eight lock on the remote controller and lock the motor. Then pull out the battery plug of the UAV (first pull out the power supply battery, and then pull out the flight control power supply battery, that is, first pull out the left and then the right).


